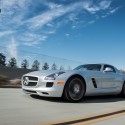
If you follow our Facebook or Instagram page you may have seen some of our rolling shots of the SLS AMG and SRT Viper. The process to get photos like this is fairly simple once you know the concepts behind it. As with any technical skill, you’ll achieve better results with practice.
The setup: 3 people; SLS driver, camera car driver, photographer.
In order to get this photo of the SLS, we needed a second vehicle to carry our photographer side-by-side with the car. On this particular day we had Cody driving a Mini Cooper. The low height of the Mini and big passenger side window was helpful for Ben (the photographer). We had a small, closed piece of road to drive up and down at around 35mph to get the shot.
The basics: Let’s break down the shot in terms of camera gear and settings. Shoot in RAW!
Firstly, using a wide angle lens is very important as it will let you get the whole car in the image. It’s also easier to keep a wide lens steady for shooting at slower shutter speeds. If you’re on a crop sensor camera use something along the lines of an 18mm wide lens (the 18-55mm kit lens is perfect for this) or on a full frame camera use a 24mm lens like we did.
Second, make sure you shoot with a slow shutter speed. If you’re not comfortable shooting in Manual mode yet, set your camera to shutter speed priority. Shoot a lot! Vary your speed from 1/15th of a second all the way to 1/125th of a second until you find the perfect balance of motion blur and sharpness on the car. This shot of the SLS was done at 1/30th of a second.
Third, the post processing. In order to make the car stand out, I did a few simple tweaks in Adobe Lightroom. I used the brush tool in two instances. One use was to burn the sky by pulling the exposure down and contrast up. The second brush was used to boost the clarity on the road and darken the exposure as well. That way, the sky is darker/more blue and makes the car appear brighter.

Find a couple of friends, a nice safe stretch of road and have fun taking rolling shots!


